Riding an Invisible Ellipse
June 22, 2026 · by Michael Morrison · 9 min read
I built a skateboard mini ramp with the transition radius cut from a vinyl template off an Illustrator drawing. The vinyl stretched, the radius came out an ellipse no one could see — only feel — and fixing it meant tearing the ramp down to a pencil on a string. A small parable about where to trust a machine.
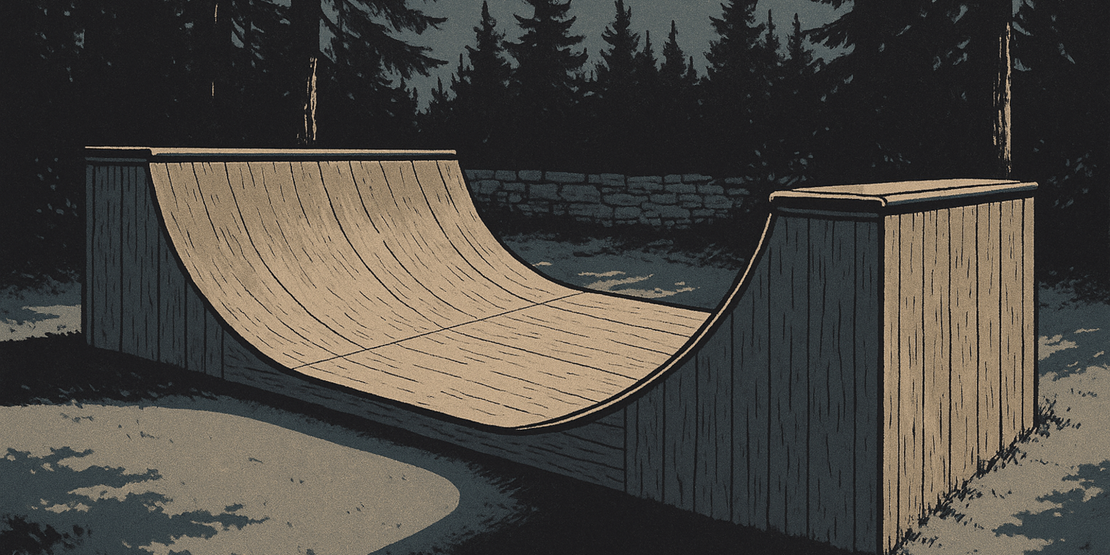
I rarely do things the easy way. In this case I designed and built a skateboard mini ramp not only to be durable and ride well, but also to look cool and blend into a residential environment where skateboard ramps aren’t always welcome with open arms. So from the jump I wanted it to look like it belonged, it needed to blend into the environment, a small pad I leveled within cedar tree woods with a surrounding limestone wall. Part of that blending involved open transitions, meaning instead of a squared off cut “box” to form the curved support structure, I wanted it curved top and bottom, which you rarely see done outside of metal framed ramps. I am not (yet!) a metalworker, so coming up with a way to have fully curved transitions was an integral part of the design.
We’ll come back to the design specifics, but skipping ahead to completion for a moment…the ramp was finished, and it rode wrong. Nothing looked wrong. It was beautiful. The custom laminated undercut transitions were super cool, the pool coping was just as fun and aggro as planned, mission accomplished. But I’d drop in and feel something off, a half-beat of whip I couldn’t explain. I had skated dozens of ramps with similar specs my whole life yet the radius somehow felt too quick, and not in a good way. My friends felt it too, and one by one they stopped coming by to skate it. Too tight, they said. Too quick. I have a reputation for liking my ramps fast, so the diagnosis fit the usual suspect, and I let it stand for a while. I skated it alone and tried to talk myself into liking it.
They were half right, and the half they got wrong is the whole story.
What I couldn’t see
Because I had wanted those undercut open transitions, I’d been worried they’d be harder to trace with a pencil the old school way ramps are typically built, so I leaned into technology. I drew the transition in Illustrator — a clean six-foot radius, a perfect arc on the screen — and had it cut into adhesive vinyl like you’d wrap a vehicle with. Then I stuck the vinyl onto plywood and traced it for a saw template. I eventually figured out that somewhere in that handoff the vinyl stretched. Not much. Just enough. By the time the vinyl curve reached the wood it was no longer a circle but an ellipse, and an ellipse has no single radius: mine sat near six feet down low and tightened as it rose, so the transition got quicker exactly where you’re most committed, at the lip. That was the weird whip. My legs knew before I did.
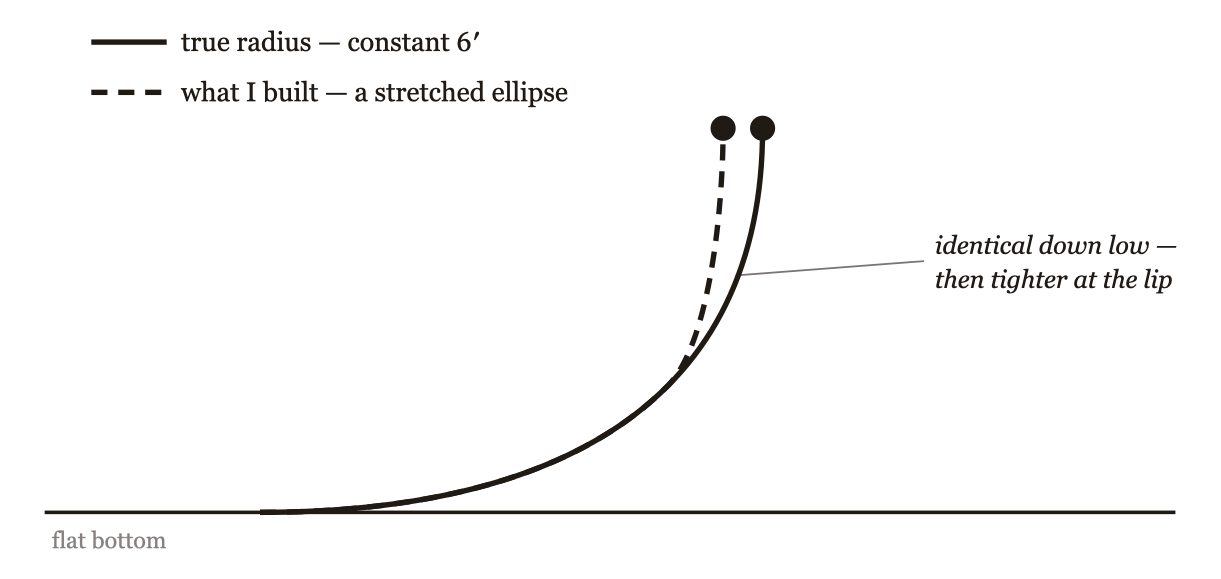 Same arc down low — the stretched ellipse only tightens near the lip, quicker exactly where you're committed.
The drawing was right. The cutter cut precisely what I handed it. The error lived in the one physical seam between them, vinyl to wood, where a small amount of unnoticeable stretch quietly turned a circle into something that only looked like one. You can’t see a few percent of ellipse. I built the thing and I couldn’t see it. It passed every check I knew to run, because every check I knew to run was visual, and this flaw only existed in motion, under load, at speed.
Ramps are notoriously hard to build by sight, which is why we trust rough formulas about transition radius to height. Pretty much every skater who has built a ramp or whose dad has built them a ramp has a story where the first try was almost unrideable due to being too tight. So I was well aware of that risk. My formula was sound, I just never counted on the math getting altered by the Illustrator vinyl trick during install. Elliptical transitions aren’t unheard of — a few prominent vert ramps back in the day were deliberately elliptical, like the one Tim Payne’s Team Pain built for the 1986 VP Fair pro demo in St. Louis, and they kinda worked. But over time the verdict came back that a constant radius skates more predictably, so the culture moved on. Except for my accidental ellipse!
Proving the elliptical issue was an interesting part of this story, as it proves out something that youth often exclaims in classrooms…“when will I EVER use this!?” How do you compute the radius of a curve from a chord laid across it? Sixteen year old me would’ve said it’s useless theory, but my man Pythagoras still lingered somewhere in the back of my mind from nearly forgotten geometry classes long ago. Pythagoras showed us that if you know the length of a chord on the curve and the distance from the center of that chord to the curve, you can solve for the radius. Or to the skateboarder looking at a wonky transition with a WTF look on his face, you do this:
- Take a 4’ level and lay it on the radius running lengthwise with the flat
- Use a measuring tape to measure the distance from the center of the level (the chord) down to the ramp surface, that’s your measured gap (M) in inches
- Calculate the radius using this formula, the result will be in feet:
R = (24 / M) + (M / 24)
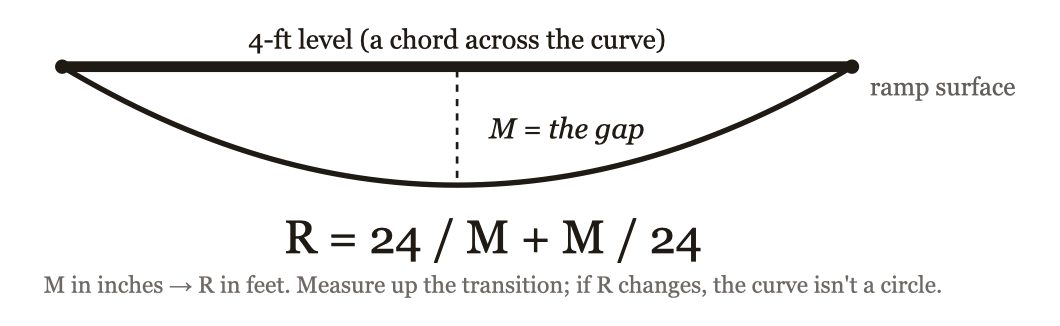 Lay a level across the curve, measure the gap M at its center, and the radius falls out.
I measured down at the bottom of the transition and then worked my way up, primarily out of curiosity because it felt like the ramp got weird at the top. Sure enough, that measurement from level to curve got a little larger as I went up the ramp, meaning the radius number shrank. The ramp got quicker from flat to coping. There it was finally where I could see it: a radius that refused to hold still, each reading tighter than the last. The machine-assisted approach made the error. A straight edge and some 8th grade math caught it.
The fix
Here’s the problem with what I learned: pool coping is permanent. It’s set in mortar, it’s not moving — the whole reason finishing a backyard wood ramp like a concrete pool is a faintly unhinged thing to attempt. I talked to Phil at Tedder Stone in Oregon, where I had gotten the pool coping, he was super helpful and said it could maybe possibly be done with a giant concrete saw laid sideways and a lot of luck, but that it’s generally a bad idea. I stewed on the dilemma while skating alone and pondering the pain of disassembling my carpentry masterpiece. Was it even possible to fix the transitions while leaving the pool coping intact? A plan eventually emerged, and I’ve never seen anyone do this so thoroughly because it’s ridiculous - I’d rebuild the entire skateable part of the ramp from coping to coping. And that’s what I did.
I drew the new curve the oldest way there is: a batten screwed down at one end, a pencil at the other spaced exactly to the ramp radius, and swung through a single arc. That jig promises something no Illustrator file can. It can only draw a circle. The constraint is the guarantee. A nail and a stick describe a true radius by physics; a number on a screen just claims one.
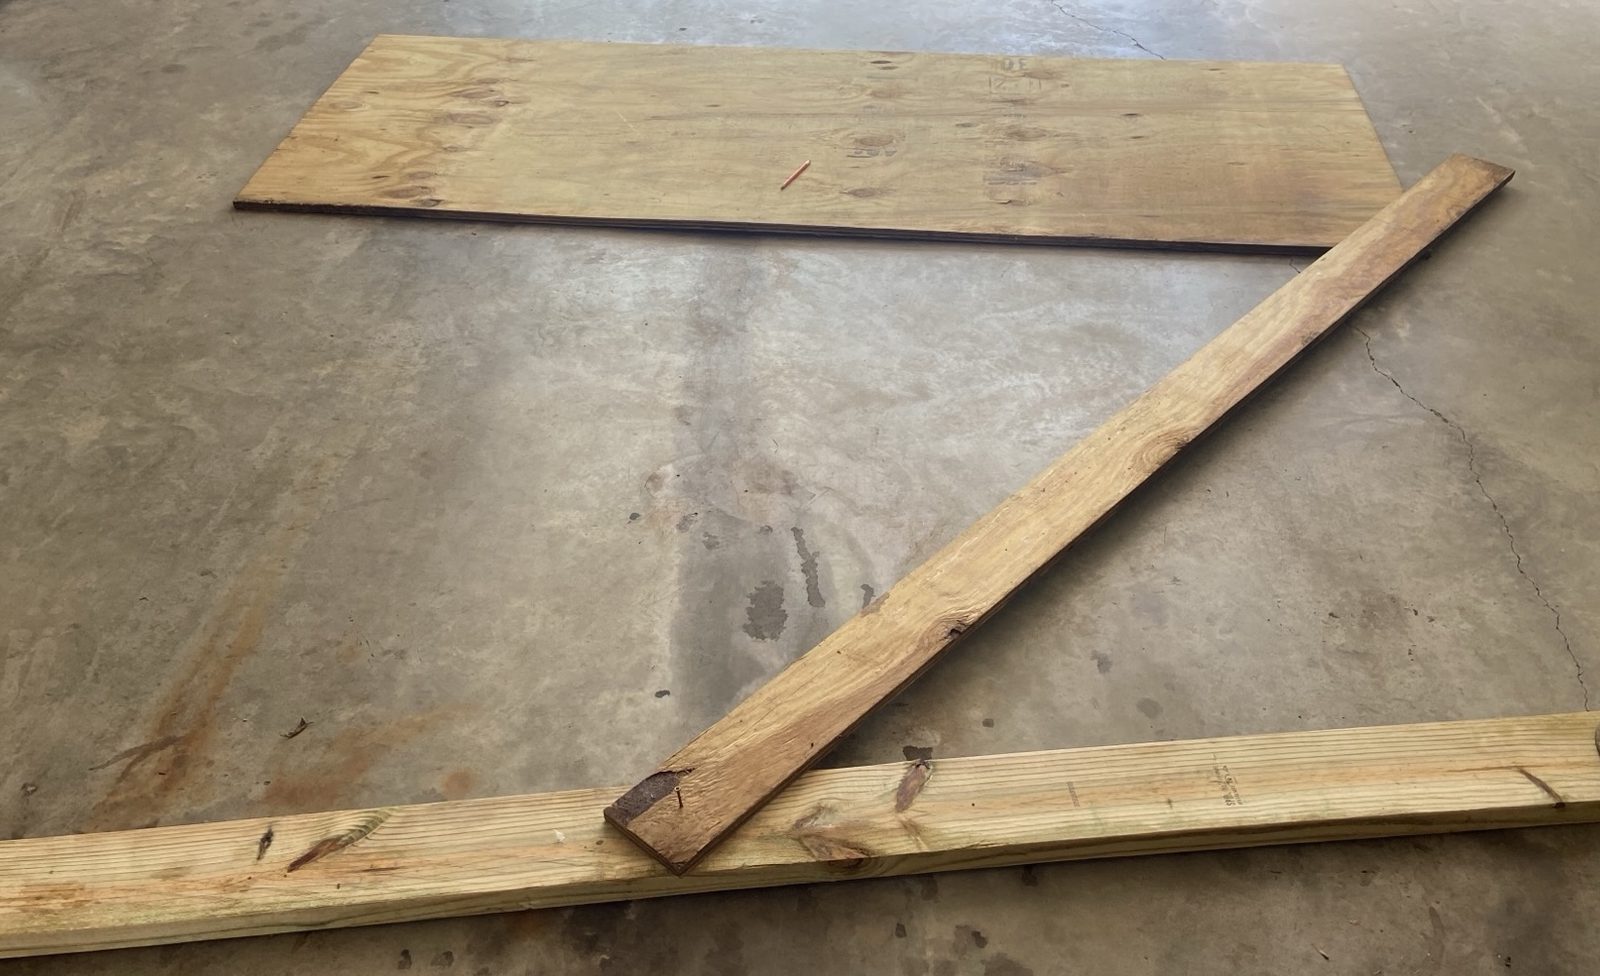 The whole fix: a batten, a screw, and a pencil — a jig that can only draw a circle.
I gave the new curve a slightly mellower six-and-a-half-foot radius, swung it by hand, and this time it stayed the same curve the whole way up. While the ramp was already in pieces I made the teardown earn it: a band of mosaic tile under the coping that hadn’t been there before, stairs down the far side between the ramp and the stone wall, some hidden bracing sistered in while the bones were open. It now skates the way it always should have. It’s still at the edge of being too quick for my friends, which is perfect to me. Everybody unanimously loves the pool coping, a very rare treatment for a backyard wooden ramp. The coping is perfect for the kinds of lip tricks mini ramps are built for, a reward that only shows up on the far side of the suffering.
The same seam, everywhere
The moral isn’t “machines bad, hands good,” and I want to be careful not to let it sound like that’s my takeaway. I’ve since skated ramps designed in CAD and cut on a CNC , and the accuracy is better than anything I’ll ever swing with a pencil. In fact, I’d love to try a CNC build one of these days. I went on to build a 3D ramp-design tool myself. The machine was never the problem. I had picked a machine-assisted path with a quiet failure mode tucked into it, a step where the automation handed off to the physical world and nobody was minding the seam.
I make software, so I think about the mini ramp build debacle more than is probably healthy. The seam is everywhere now. A model writes code that builds and runs almost right but not quite. An answer comes back fluent, confident, and off by an ellipse you won’t feel until you’re committed at the lip with real injury consequences on the line. The risk has migrated to exactly where it sat on my ramp: the handoff, where something precise on a screen crosses into a world with its own physics, and where the only test most of us run is whether it looks right. It looked right. It always looks right. What saves you is a process that verifies the truth rather than trusting the pipeline to carry it intact: a type that won’t compile when you’re wrong, a test that fails out loud, a nail and a stick that can only draw a circle. A model is a vinyl cutter for everything now. The drawing comes instant and free; so does the stretch, invisible and at a scale no protractor will ever catch up to.
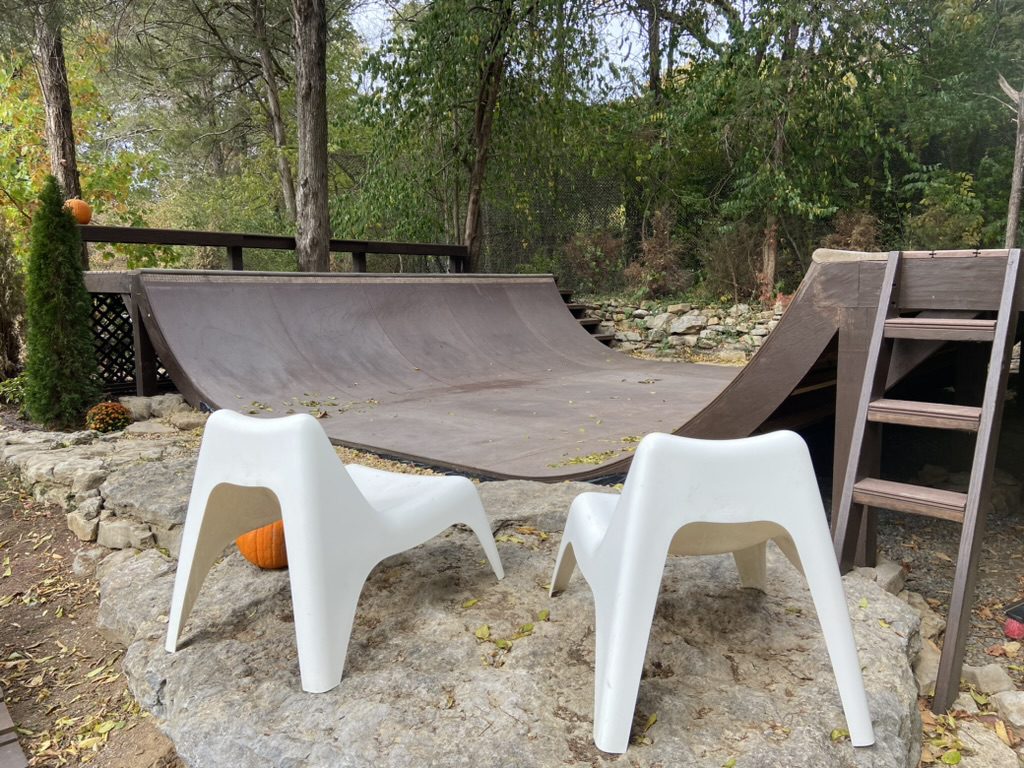 The ramp, true now.
The ramp is true now. The most trustworthy tool in the whole build is still a scrap of wood with a screw through one end, and I keep that learned knowledge always at the ready. Sometimes simpler really is better. The lesson it holds is small and portable and I haven’t finished learning it: find the seam where your error would be invisible, and put your hand back on it.
The build this came from: Skateboard Mini Ramp . Kin: The Self-Riding Bicycle (means/ends).
Want more like this?
Subscribe to get new posts from the lab delivered to your inbox.
or grab the RSS feed